-1.png)
How Hat Embroidery Differs from Other Fabric Embroidery
Hat embroidery presents unique challenges due to the curved surface and varying fabric types. Unlike flat fabrics, the shape of the hat can cause designs to distort or misalign. Precision is key to achieving clean, sharp stitching on these challenging surfaces.
Types of Hats
Structured Hats:
Like baseball caps and trucker hats, these hats have a stiff crown and a large flat surface, making them ideal for embroidery on the front.
Unstructured Hats:
Such as berets, bucket hats, and knit beanies, these are softer and lack a defined structure, making it trickier to embroider as the design may distort or blur.

Embroidery Design Patterns
Embroidery Design Patterns
When it comes to choosing an embroidery design for hats, the simplicity and clarity of the design are important to ensure it translates well onto the hat. Here are some popular types of embroidery patterns for hats:
Simple Logos or Text:
For a clean, minimalist look, consider using simple logos or text. These types of designs work well on structured hats and can easily be applied without distortion. Keep the shapes clean and avoid overly intricate patterns that might not stitch well.
Monogram Embroidery:
This design involves adding a small, personalized touch, such as initials or small motifs. It’s ideal for creating custom, personalized hats that are clean yet stylish.
Minimalistic Motifs:
If you want a more subtle design, opt for small, simple motifs like small animals, symbols, or abstract shapes. These designs look sharp without overwhelming the hat and suit a wide range of hat types.
Choosing the Right Tools
Hat Embroidery Machines
Not all embroidery machines are suited for hats—especially when it comes to tackling the unique challenges they present. BAi THE VISION, for example, offers precision with features designed to handle both structured and unstructured caps, ensuring your designs remain sharp and consistent on curved surfaces.
Cap Hoop
A cap hoop is crucial for holding the cap securely while stitching. The curved nature of a cap makes it prone to shifting or puckering, so a properly fitted hoop prevents this and ensures alignment. There are various types of hoops, including traditional flat hoops and specialized cap hoops designed for different cap shapes.
Cap Station
A Cap Station is a specialized unit designed to assist in positioning and securing the cap onto the embroidery machine with ease. It allows for faster setup and greater consistency in placement, helping you achieve precise results every time.
Cap Driver
The Cap Driver is an advanced tool that helps drive the cap into the right position on the machine, ensuring smooth movement during stitching. This tool reduces friction and minimizes fabric damage, allowing for cleaner, more accurate embroidery.
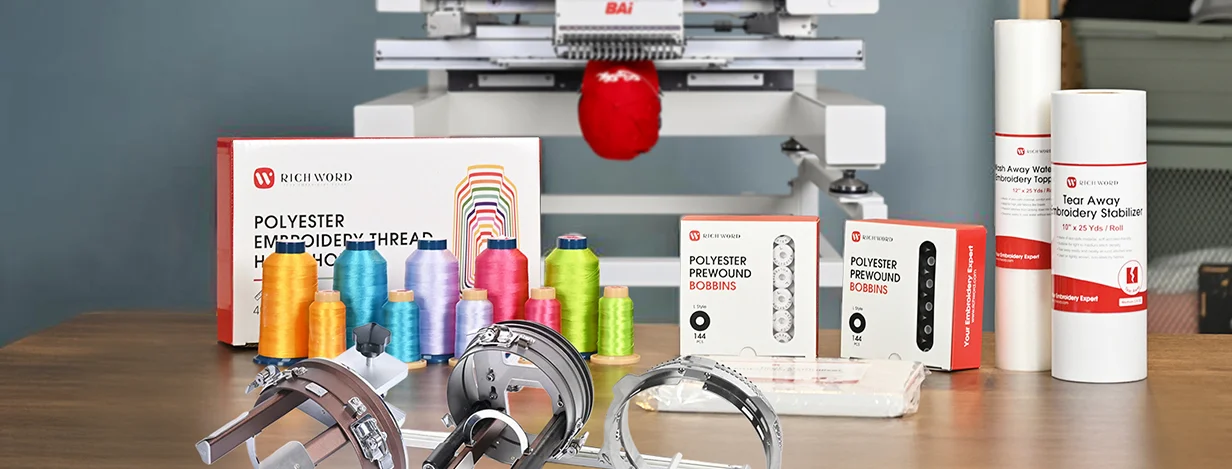
Stabilizers and Backing Materials
Using the right stabilizer is essential for successful hat embroidery. Depending on the hat's material and the complexity of the design, you may need a specific type of stabilizer:
- Tear-away stabilizers are often the go-to for structured hats like baseball caps.
- Cut-away stabilizers offer more durability and are ideal for unstructured hats like beanies or soft caps.
- Water-soluble stabilizers are great for finer details and lighter materials, providing support without affecting the design’s appearance.
Embroidery Threads and Needles
The right thread and needles are essential for maintaining clean, vibrant designs. Thicker threads may be necessary for visibility on caps like cotton twill caps, denim caps, or canvas caps, while thinner threads are better suited for finer caps like polyester caps, nylon caps, or wool caps, where intricate details need to be preserved. Be sure to use needles specifically designed for caps, such as a ballpoint needle for knit caps or a sharper needle for structured caps.
Tips for Digitizing and Setup
Tailoring Your Design for Hats
Hat embroidery requires thoughtful digitizing to accommodate the unique shape and material of the hat. Unlike flat fabrics, hats have curves and seams that affect how a design will stitch out. Digitizing your design correctly is essential for ensuring it complements the curves and seams of the hat. Embroidery software can help adjust stitch density, length, and angle to prevent puckering and distortion, ensuring a sharp, clean finish.
Top Thread Tension
Optimizing Machine Settings
For flawless results, adjust your embroidery machine settings to suit the specific hat and design:
- Tension Settings: The correct tension is crucial for ensuring even stitches and preventing issues like thread breakage or puckering. The appropriate tension settings can vary based on the type of embroidery thread and the application. Adjust the tension according to the material of the embroidery thread and its intended usage.
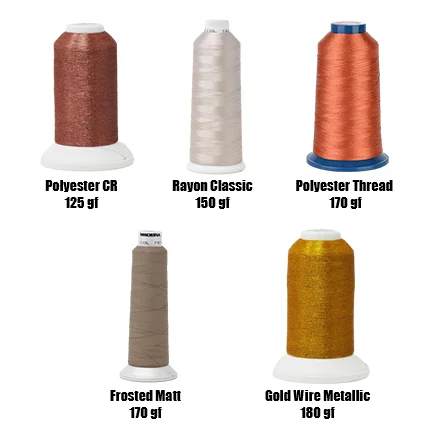
- Top Thread Tension:
Polyester CR: 125 gf
Rayon Classic: 150 gf
Polyester Thread (Polyneon): 170 gf
Frosted Matt: 170 gf
Gold Wire Metallic: 180 gf
TIPS: The top thread tension can have a tolerance of 5gf-10gf.
- Bobbin Tension:
For Cap Embroidery: 25 gf
Speed Adjustment
The speed of the machine should be adjusted based on the complexity of the design and the thickness of the fabric. Slower speeds provide better control, especially when dealing with intricate designs or thicker fabrics, reducing the risk of thread breakage or skipped stitches. It’s advisable to slow down the machine when embroidering hats to ensure precise stitching.
Common Challenges and Solutions
Common Challenges and Solutions
Several common challenges may arise when embroidering caps, but each one has a solution:
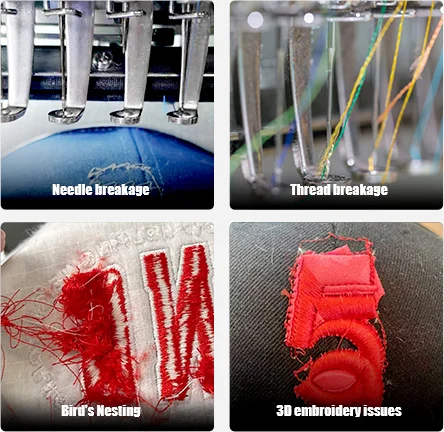
Needle breakage is common when working with thick or dense materials.
Solution: To avoid needle breakage, use a needle appropriate for the material’s thickness, such as a 75/11 sharp needle for dense fabrics. Ensure that the needle is installed correctly and avoid overly tight tension settings that might strain the needle. Reducing machine speed for thicker materials can also help prevent unnecessary stress on the needle.
Thread breakage can occur when working with structured caps made from tough materials.
Solution: When thread breakage occurs, check if the upper and bobbin threads are properly threaded and ensure the tension settings are balanced. It’s helpful to use high-quality thread that’s designed for tougher fabrics and ensure that the bobbin case is clean and free from dust. Switching to a thicker thread for tougher fabrics can also reduce the likelihood of breaks.
Bird's Nesting happens when the thread loops under the cap, creating a tangled mess.
Solution: To avoid bird’s nesting, carefully inspect the threading path to ensure everything is properly aligned and threaded. If this issue persists, try using a different needle type or adjusting the upper thread tension. Additionally, reducing the embroidery speed and checking the bobbin thread for proper tension can prevent the threads from becoming tangled.
3D embroidery issues, such as foam leakage, can significantly impact the final result.
Solution: Built-in 3D embroidery optimization is key to preventing foam leakage and ensuring precise design alignment. The optimization prevents foam from spilling during stitching, while also maintaining the correct alignment of your design throughout the process. This ensures your 3D designs remain sharp, clean, and consistent, delivering professional-quality results.
Optimized Parts for Hat Embroidery
For the best results, it's essential to use high-quality tools and equipment specifically designed for hat embroidery. BAi THE VISION, for example, is optimized for the unique challenges of hat embroidery, featuring advanced features like:
High-speed, low-friction rotary hook
This rotary hook is specifically designed for tough materials like denim caps, cotton caps, or canvas caps, preventing thread breakage and ensuring smooth stitching.
One-click hoop selection
This feature makes it easy to adjust the hoop to fit the design perfectly, saving time and simplifying side embroidery. It automatically adjusts based on the cap's shape and size, ensuring consistent results without the need for manual disassembly.
Intelligent speed reduction algorithm and improved motherboard
BAi embroidery machines optimize stitching speed while maintaining high quality and accuracy, enhancing both efficiency and performance.
Optimized machine head design
Friction between the machine head and the cap can cause scratches or fabric damage. The upgraded machine head, combined with the improved cap drive and hoop design, significantly reduces friction. This ensures the cap material remains intact throughout the stitching process, while providing better access to the brim, allowing for more precise embroidery on challenging areas.
While hat embroidery can be challenging, the rewards are worth it. With the right equipment and techniques, you can create personalized, eye-catching designs that make a statement. Start with simple projects and gradually tackle more complex designs as you master this craft.