Pattern 950019
2024-02-05
How to choose the right embroidery needles for your project?
2024-03-18EMBROIDERY TIPS
Essential Knowledge for making a better 3D Hat Embroidery
POSTED ON MARCH 3rd,2024 BY BAi
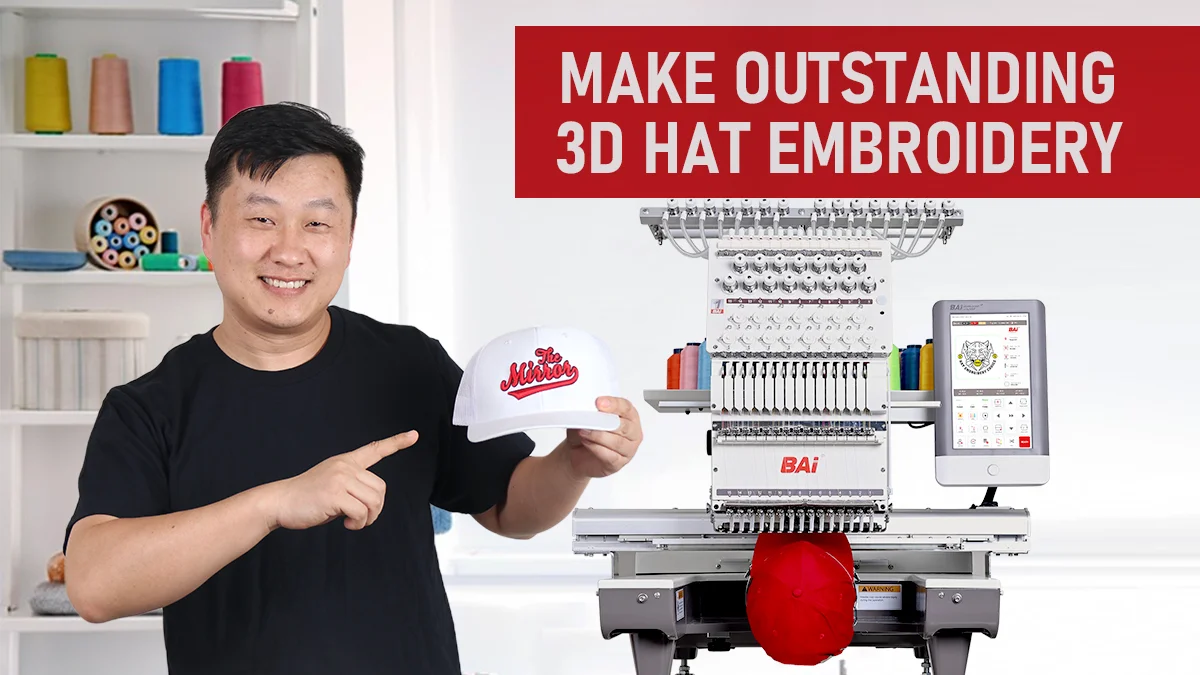
In the world of fashion and personalized decoration, 3D hat embroidery has always been widely loved for its unique three-dimensional appearance. Compared to regular hat embroidery, it only adds one material ( 3D embroidery foam), but it is extremely cost-effective. As a job that "isn't as simple as it sounds", if you want to do it well you need to fully master the relevant knowledge, which will help you save a lot of trouble.This article will introduce the following aspects:
#1 What is 3D hat embroidery?
#2 How is 3D hat embroidery different from regular hat embroidery?
#3 What are the common types of 3D foam used?
#4 How to do 3D hat embroidery?
#5 How to improve the quality of 3D hat embroidery?
#1 What is 3D hat embroidery?
3D hat embroidery refers to the technique of embroidering hats by enclosing 3D Embroidery Foam with embroidery thread, creating embroidered designs with a three-dimensional effect. Simply put, it involves adding a layer of special foam that makes the embroidered design stand out on the surface of the hat, enhancing its vividness, impact, and overall visual appeal.
#2 How is 3D hat embroidery different from regular hat embroidery?
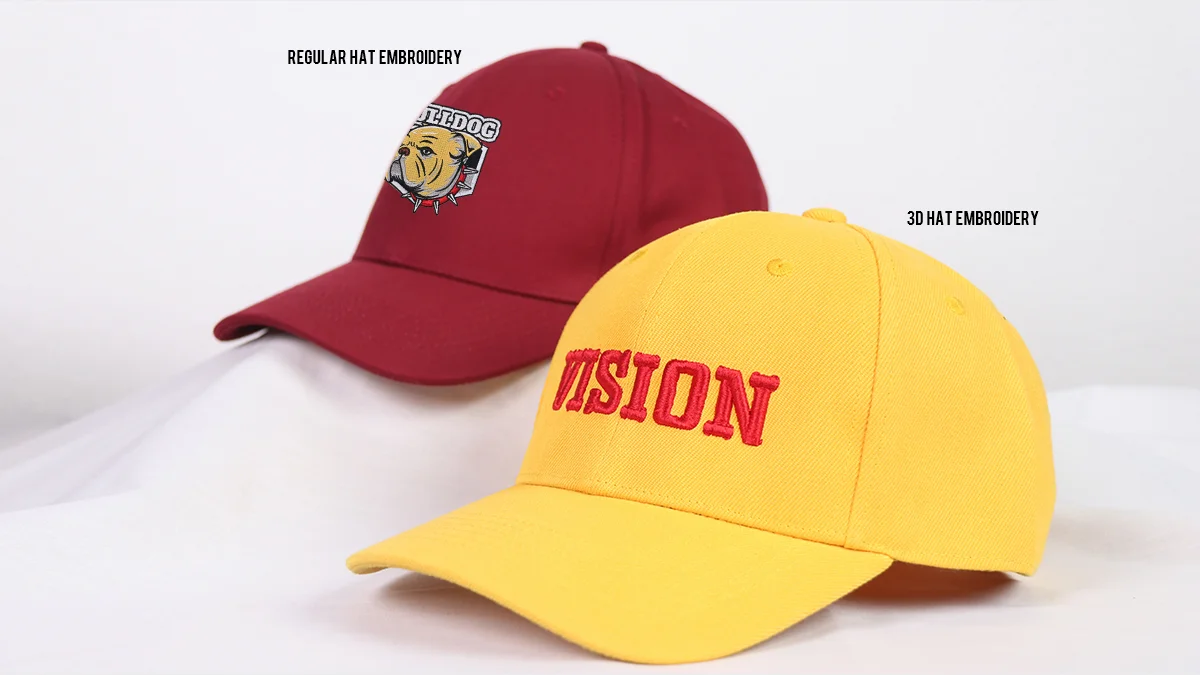
Curious about the differences between 3D hat embroidery and regular hat embroidery? Let's take a look together:
-1 Embroidery Effect
- 3D Hat Embroidery: The emphasis is on creating a three-dimensional effect. By using 3D Embroidery Foam, the embroidery on the hat stands out and protrudes, resulting in a more three-dimensional and layered effect. It is more personalized and eye-catching.
- Regular Hat Embroidery: Traditional embroidery materials such as regular embroidery threads and backing materials are used to complete flat embroidery designs.
-2 Materials Used
- 3D Hat Embroidery: Special materials like 3D Embroidery Foam are used to provide support on the fabric surface, making the embroidery more prominent.
- Regular Hat Embroidery: Traditional embroidery materials such as regular embroidery threads and backing materials are used to complete flat embroidery designs.
-3 Design Considerations
- 3D Hat Embroidery: Consideration needs to be given to the curvature and shape of the hat to accommodate the three-dimensional embroidery requirements. Patterns and design elements are often chosen to better suit the 3D effect.
- Regular Hat Embroidery: Design primarily focuses on the flat surface, emphasizing simplicity and classic designs without the emphasis on creating raised effects on the hat.
-4 Difficulty of Production
- 3D Hat Embroidery: Due to the emphasis on the three-dimensional effect, it requires more complex techniques and precise operations, including foam cutting and adjustment, as well as mastery of embroidery techniques.
- Regular Hat Embroidery: Relatively simpler, involving primarily flat embroidery techniques, making it more suitable for beginners or situations that prioritize clean and simple designs.
Overall, compared to regular hat embroidery, 3D hat embroidery emphasizes a more three-dimensional and layered sense, and through clever design and embroidery techniques, the patterns on the hat are more prominent and eye-catching. Intended to make the pattern look more realistic and vivid, and better adapt to the curve and structure of the hat.
Ordinary hat embroidery focuses more on graphic design and traditional style. You can choose according to your needs.
#3 What are the common types of 3D foam used?
When it comes to 3D hat embroidery, foam is typically used to provide support and sculpt the embroidered areas, ensuring a more three-dimensional embroidery effect. Common types of foam include Craft Foam, Traditional Puff Foam, and Specialized Puff Foam. Here are the details:
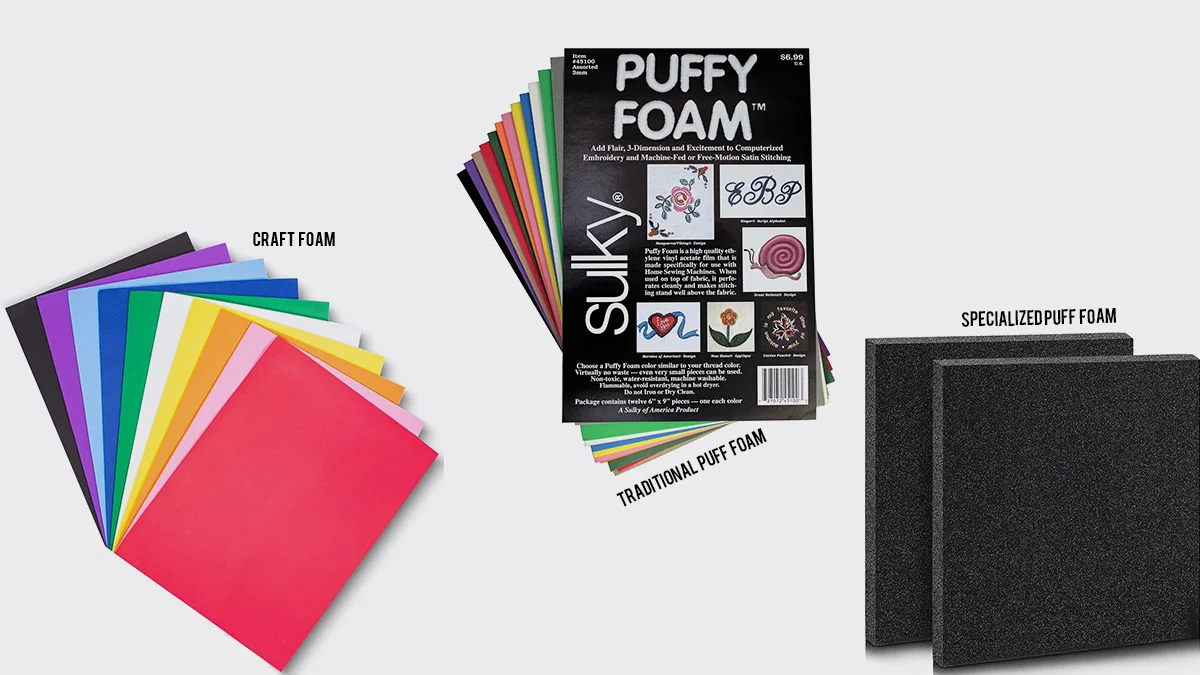
-1 Craft Foam
Types
Craft Foam comes in various types, including:
- Sheet Foam: Common flat foam used for crafting models, decorations, etc.
- Stick Foam: Thinner and longer foam sticks used for crafts, lightweight construction, etc.
- Colored Foam: Foam that has been dyed, suitable for art projects, crafts, etc.
Colors
Craft Foam offers a wide range of color options, including basic colors like white, black, gray, brown, as well as some bright or vibrant colors. Additionally, it can be spray-painted or coated with other colors as needed.
Thickness
Craft Foam is available in various thicknesses, ranging from 2mm to 10mm, depending on the project requirements and design needs.
Advantages
- Versatility: Craft Foam is readily available and offers a wider range of color, thickness, and shape options to meet various embroidery design needs.
- Easy to work with: It is easy to cut, shape, and paint, making it suitable for creating different three-dimensional effects.
- Relatively affordable: Craft Foam is usually more budget-friendly compared to Traditional Puff Foam.
Disadvantages
- Lower puffiness: Craft Foam typically has less puffiness, which may not provide the same level of three-dimensionality as Traditional Puff Foam.
- Less cleanliness: Craft Foam often leaves behind fuzz after removing the backing paper, compromising the overall neatness of the final result.
-2 Traditional Puff Foam
Types
Traditional Puff Foam is primarily available in the following types:
- Single-layer Foam: Single-layer puff foam used for general filling and support.
- Multi-layer Foam: Multiple layers of stacked puff foam used for designs that require a more three-dimensional effect.
- Colored Foam: Puff foam treated with dye to provide additional color options.
Colors
Traditional Puff Foam typically offers basic colors like white, black, and may have some bright or vibrant color options available.
Thickness
It is generally thinner, usually ranging from 1mm to 5mm, which helps achieve a more three-dimensional embroidery effect.
Advantages:
- Higher three-dimensionality: Traditional Puff Foam has good puffiness and elasticity, allowing embroidered designs to have a higher three-dimensional effect when applied to hats.
- Suitable for intricate designs: Due to its puffiness, it is suitable for more detailed embroidery designs, enabling the presentation of richer details.
Disadvantages:
- Relatively limited structure: Traditional Puff Foam has a relatively uniform structure and may not meet certain specific design requirements.
- Potential difficulty in processing: Traditional Puff Foam is softer and more elastic, which may make it challenging to achieve precise cutting and shaping.
-3 Specialized Puff Foam
Types
Specialized Puff Foam may include the following types:
- Fire Retardant Foam: Foam with fire-resistant properties used for embroidery projects in special environments.
- Anti-static Foam: Foam with anti-static properties used for embroidery projects involving static-sensitive materials.
- High-density Foam: Foam with higher density and strength used for embroidery designs that require more durable support.
Colors
Specialized Puff Foam may offer a wider range of colors, including special effect colors such as metallic or glossy finishes. Additionally, custom color options may be available.
Thickness
The thickness can be customized based on specific design requirements, and there may be more thickness options to meet the needs of particular projects.
Advantages
- Customization options: Specialized Puff Foam may have a wider range of color, thickness, and shape options, catering to a variety of embroidery design needs.
- Specialized features: It may incorporate special functional materials such as fire retardants or anti-static agents to provide additional functionalities.
Disadvantages:
- Higher cost: Specialized Puff Foam usually comes at a higher price compared to regular Craft Foam and Traditional Puff Foam.
- Availability: Due to their specialized nature, certain types of Specialized Puff Foam may not be readily available and may require custom ordering or sourcing.
Common types of foam materials include EVA Foam, PE Foam, and PU Foam. They are lightweight, flexible, and easy to cut, shape, and paint. They are also durable, resistant to deformation or damage, and offer a certain level of waterproofing. These foams can be used to fill gaps in hats, providing excellent support and stability.
When choosing the most suitable foam thickness for 3D hat embroidery, it typically depends on the hat design, complexity of the embroidery, and desired three-dimensional effect. Here are some general recommendations:
1mm - 3mm:
- Suitable for simpler embroidery designs, such as basic text or small patterns.
- This thickness may be sufficient for subtle three-dimensional effects, like simple embossing or minimal layering.
3mm - 5mm:
- Suitable for moderate complexity embroidery designs, such as larger patterns or designs with some depth.
- This thickness can provide more filling and support for embroideries that require more pronounced three-dimensional effects, making the embroidery stand out.
3mm - 5mm:
- Suitable for highly complex designs with rich layers, such as large floral or animal patterns.
- Thicker foam can provide more filling and support for embroideries that require very prominent three-dimensional effects or deeper embossing.
It's important to note that while 3D hat embroidery aims for a three-dimensional effect, thicker foam is not always better. Excessively thick foam can make it difficult for embroidery needles to penetrate and may result in a hat that feels bulky and uncomfortable when worn.
The ideal foam thickness should provide sufficient three-dimensional effect while maintaining a lightweight and comfortable hat.
The mentioned foams can all provide support beneath the embroidered area, ensuring that the embroidered design exhibits a pronounced 3D effect on the hat. The choice of foam depends on the embroidery design requirements and personal preferences, but using 2-5mm Puff Foam is recommended as it offers a more robust appearance and better embroidery quality.
When using foam, it's important to ensure compatibility with stabilizers and thread to avoid any adverse effects on the final outcome of the embroidery.
#4 How to do 3D hat embroidery?
Before proceeding with 3D hat embroidery, it is important to ensure that you have completed the digitization of the design. The design for 3D embroidery differs from regular embroidery, where the top layer should be denser than the bottom layer. It is recommended to have twice the density on the top layer compared to the bottom layer. Having a more dense stitch pattern on the surface of the embroidery ensures a smoother, more compact appearance and enhances the clarity of the details.
To increase density in the areas where it is needed, you can choose to use a dense layer of satin stitches. Satin stitches provide better coverage and filling effects, making them suitable for larger areas. If thick satin stitches are not available, you can use regular satin stitches and stitch twice in the areas where you want to increase density to achieve a density that is twice that of the bottom layer. Additionally, shorter stitches may need to be modified by increasing the number of stitches and elongating them to ensure sufficient density and coverage in corner areas.
After these preparations, you can start with the actual process of 3D hat embroidery! Follow these steps:
- Install the hat driver to the embroidery machine, fix the hat with the hat frame, and then install the hooped hat on the hat driver.
- If you are using an automatic mode, switch to manual mode.
- Operate the machine as you would for regular embroidery, completing the bottom layer embroidery that doesn't require 3D embroidery foam, outlining the design.
- After the bottom layer of embroidery is completed, stop the machine and use fixing tape to cover the embroidery pattern with 3D foam. It should be noted that your 3D foam must be larger than your embroidery pattern.
- Continue embroidering on the foam until the embroidery is complete. Start with securing stitches (which should be considered during digitization).
- Remove the hat and hoop from the machine. Instead of immediately removing the hat from the hoop, it's easier to remove the foam first. Tear off the outer layer of foam with your hands, then use a thread cutter nipper to remove the inner layer of foam. Now, your 3D embroidered hat is complete!
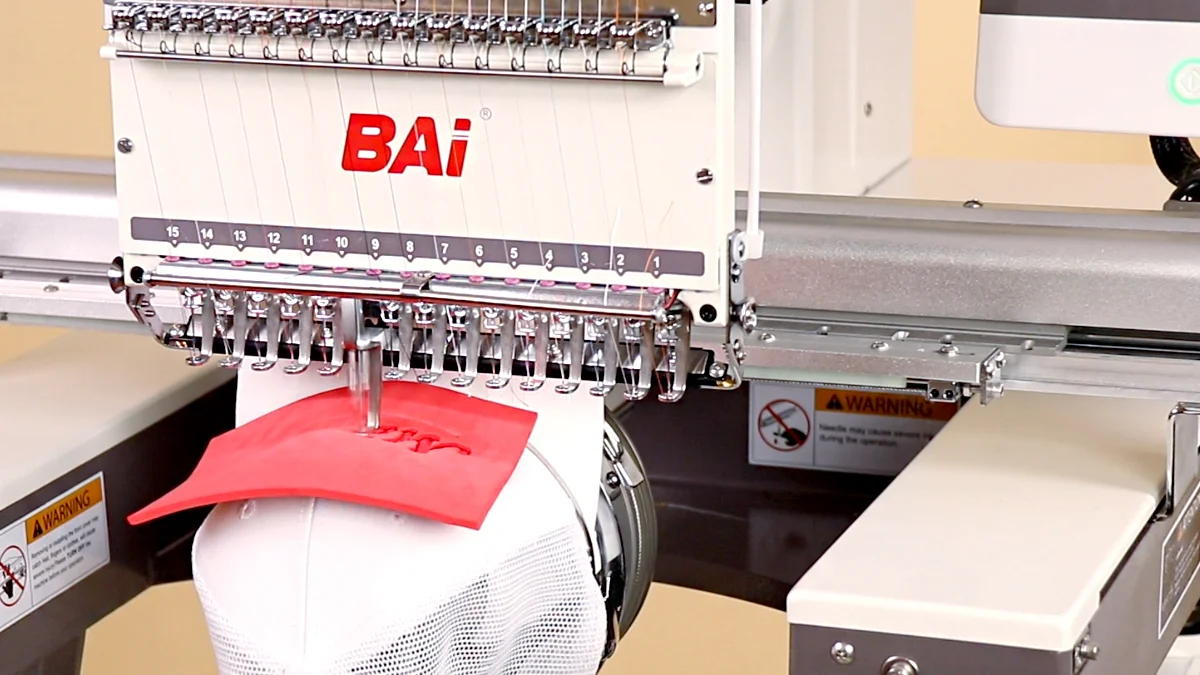
In general, 3D hat embroidery is an embroidery method that changes the embroidery effect from 2D to 3D based on conventional hat embroidery through digitization and adding Foam. You can improve your 3D hat embroidery skills through practice and get more substantial profits.
#5 How can you enhance the quality of 3D hat embroidery?
Now that you know the basic operations for 3D hat embroidery, let's take a look at some techniques and tips to make your embroidered hats even more perfect!
- It's recommended to use a medium-sized embroidery needle, usually a 75/11 or 80/12, as it provides enough strength and stability to easily go through the fabric and foam of the hat without being too thick and damaging the materials.
- Since hats are not frequently washed, you can use tear-away stabilizer to help prolong the lifespan of the foam used in 3D embroidery.
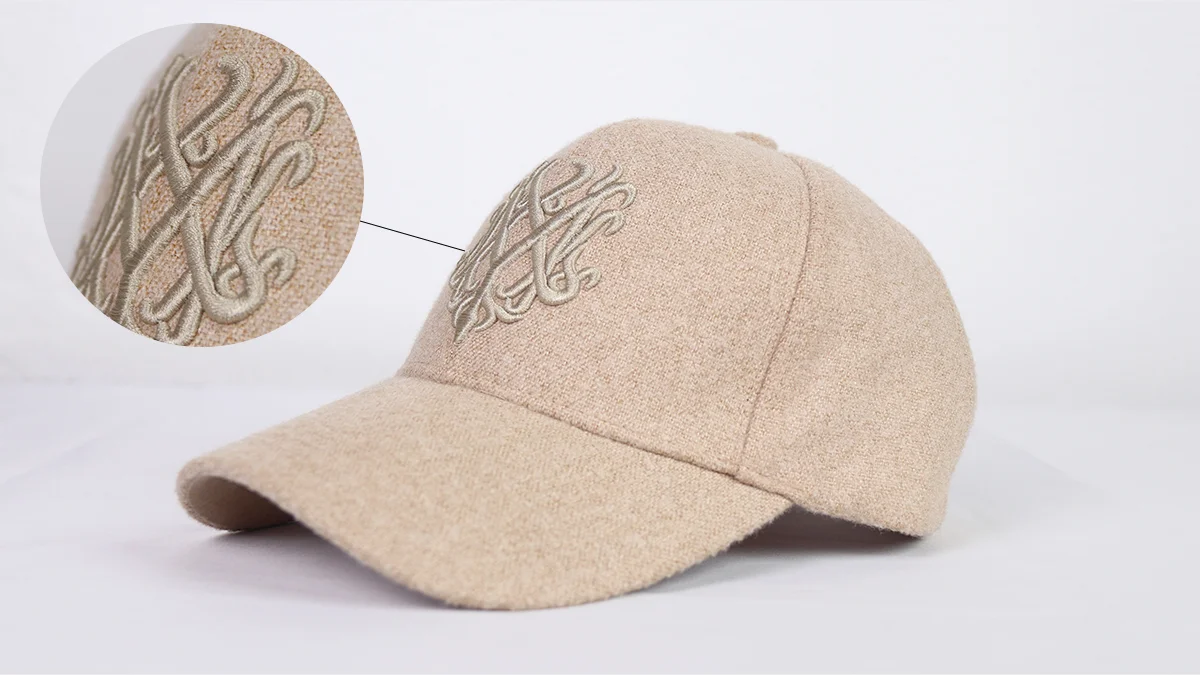
- Increase the tension slightly higher than the average tension setting to ensure smoother machine operation when embroidering on foam.
- It's advisable to use 100% polyester thread. This way, you won't have to worry about the foam catching fire when using heat to remove excess foam.
- Use foam that matches or closely resembles the color of the embroidery thread. This will create a harmonious look for your embroidered designs.
- Due to the added foam during the embroidery process, run your machine at a slower speed than usual to avoid any needle or thread breakage. Keeping the speed between 500 to 600 stitches per minute can yield good results.
- Place a cloth over the completed design and lightly press it with an iron. This will help remove any remaining foam. As the iron heats up, the foam particles will shrink and disappear. Alternatively, you can try using a heat gun to slightly shrink the foam.
By following these techniques and tips, you can enhance the quality and appearance of your 3D embroidered hats.
That's all of our blog. We hope this information provides valuable insights and guidance for your learning and creation of 3D embroidered hats. If you have any questions or would like to share your experiences, please feel free to interact with us in the comments section. Thank you for reading and supporting us! bobbins, it's time to unleash your creativity.
-1.png)

