-1.png)
How to easily embroider a T-shirt with BAi?
2022-09-15How to open wooden case & assemble your BAi machine?
2022-10-23
How to make flat embroidery with BAi?
Hi guys, welcome to BAI’s blog. Today we would like to share how to do flat embroidery. If you are interested in the embroidery business and want to know how to do flat embroidery. Or if you have purchased an embroidery machine and want to learn how to do flat embroidery, then you can take a serious look at this blog. Well, let's start today's sharing.
Step 1: Prepare related accessories
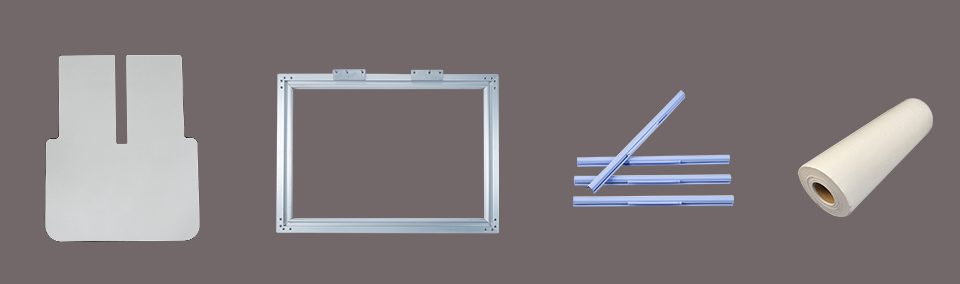
Before embroidering, firstly prepare some related accessories for flat embroidery, including the working table, Aluminum frame, Clips, backing paper & fabric. You can refer to the picture below.
Step 2:Clip the backing paper
After preparing the materials in the above picture, it is time to start the pre-embroidery preparations. First, cut the suitable size fabric, note that the fabric size should match the size of the frame. If the fabric size is too large, it will cause waste, and if the size is too small, it will not clip well in the frame. Next, cut the backing paper according to the size of the fabric. Then, open the clips of the aluminum frame, fix the fabric and the backing paper on the frame, and fasten the fabric and the backing paper with the clips. Note that the fabric and backing paper must be flattened without any folds, otherwise the embroidery effect will be greatly affected.
Step 3: Install the table
Now, Let's go to the next step, instal the frame on the machine. Flat embroidery is different from cap embroidery and T-shirt embroidery. Since the frame of flat embroidery is relatively large, it needs a table to support it, otherwise the frame will be difficult to keep stable. Before installing the frame, we need to install the table first. Remove the screws on the machine, put the table on machine and tighten the screws. Next, put the frame on the table, align the rail position, and tighten the screws on the rail.
Step 4: Electronic control operation
Now we have completed all the preparation work, the embroidery operation is about to begin. We need to make some settings on the touch screen, such as: the color of the pattern, the direction of the pattern, the position you want to embroider, etc. The following shows the setup process.
Step 1: Copy the pattern from USB
Step 2: Choose embroidery pattern
Step 3: Choose embroidery frame
Step 4: Choose embroidery direction, use arrows button move the frame, Click “Set Start”, Automatic positioning
Step 5: Choose embroidery color
Step 6: Start embroidery.
That’s all for the operation of flat embroidering. If you have more questions about it, please check the teaching video on our YouTube channel : BAi TV