-1.png)
How to handle when the thread broken abnormally?
2022-08-26How to make flat embroidery with BAi?
2022-09-18
How to easily embroider a T-shirt with BAi?
Hello, friends, welcome to BAI, today we would like to share how to embroider on T-shirt. If you own an embroidery machine but don't know how to embroider on T-shirts, then this article will be very helpful to you. OK, let’s begin.
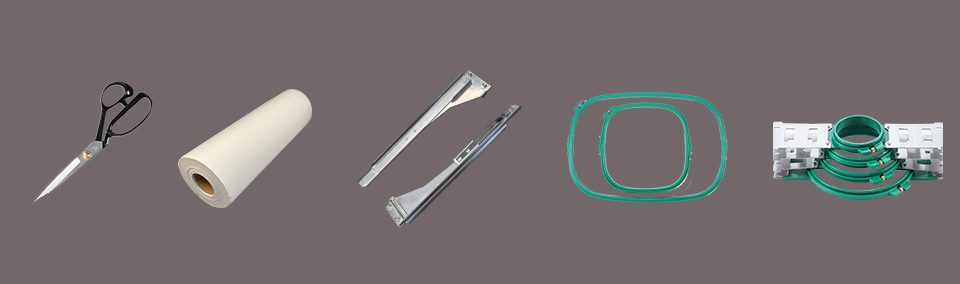
Step 1: Prepare accessories:
Firstly, you need to prepare the necessary accessories for embroidering T-shirts : Armrests, Allen wrench, Backing Paper, Different size T-shirt embroidery hoops. Just like the following picture.
Step 2:Clip the T-shirt
After preparing the above accessories, you would go to the next step: Clip the T-shirt. At this time, you would need to use the embroidery hoop and the backing paper.
The backing paper is used for supporting the embroidery, keeps the embroidery from wrinkling and prevents the stitches from sinking. About this, you can check our another blog: Recommendations for the use of backing paper.
Firstly, you need to cut the backing paper to the appropriate shape and size according to the size of the embroidery hoop. Secondly, you need to disassemble the embroidery hoop. Loosen the embroidery hoop, put it under the backing paper, then put in the T-shirt, move the embroidery hoop until the screws facing outward. Then find the embroidery position, press and fix the embroidery hoop. Finally tighten the embroidery hoop.
Step 3: Install the T-shirt device
After clipping the T-shirt, you would go to the next step, that is: install armrests. Take the armrests and put it on the rail of machine, then tighten the screws. Next, put the T-shirt neckline forward. After that, put the T-shirt hoop in the armrest. Then it’s OK.
Step 4: Electronic control operation
For the electronic control setting, you need to take the following operation, that is :
Step 4.1: Choose embroidery pattern,
Step 4.2: Choose embroidery hoop,
Step 4.3: Choose pattern direction, Press “Edit” button enter embroidery mode
Step 4.4: Choose embroidery color. M” button means manual change color, “A” button means automatic change color, Move the pattern, adjust the position, Click the “set start” button, to trace the needle area. No.1 needle area will be your actual pattern area. Use the first needle move the hoop. “-” button means reduce speed, “+” button means increase speed, Check the T-shirt neckline.
Step 4.5: Start embroidery.
Well, you can also follow this video to understand the whole process of T-shirt embroidery.
OK, that’s all for the operation of embroidering on T-shirt. If you get more questions about it, please check the teaching video on our YouTube channel : BAi TV